*This is the second part of a multi-piece series on photographing skiing, ranging from capturing skiing on your smartphone to taking a deep dive into how professionals capture skiing on the World Cup. You can read part one here.
Smartphones are versatile cameras to have on the go, but if you want to take your photography another step further and dive into the inner workings of a camera, experimenting with a manual camera is your next step. Using a manual camera for the first time can be daunting. There are an overwhelming number of modes and settings. This is also true about the best cameras for sports photography which are equipped with auto focusing. Quickly, with a bit of use, you will realize these options and settings are not as complicated as they first seem. Think of them as opportunities to expand your world of creative liberties. Understanding the different types of manual camera options out there is a good first step to understanding the basics of photography and which manual camera is right for you.
Camera Types
If you are buying a manual for the first time, you will want to think about how and where you will want to use it. Will you want to travel with it? Do you want to bring it along while
skiing? What kind of lens(es) are you looking for- an all-around lens, fixed lens, tele lens, or interchangeable lenses? What is your price range? A lot of the answers to these questions will help guide you when purchasing a manual camera.
Compact Cameras:
There are three general types of compact cameras: the point-and-shoot, zoom compact camera, and advanced compact camera.
The point-and-shoot is the most basic manual camera, although is pretty limited when it comes to setting variables or making adjustments. Smartphone technology has evolved so much, that I think people are better off sticking to their smartphone if they are considering a point-and-shoot.
Point-and-shoot example: Canon Powershot Elph 190is (*camera examples, not
personal recommendations)
If you want a low-cost, lightweight manual camera that you can throw in your pocket, drink belt or in your backpack, the zoom compact camera might be a great fit. This camera style offers a versatile camera with a magnification ability typically ranging from 28-300mm and the ability to shoot in automatic or manual. However, zoom compacts only feature auto-focus capabilities. This type of camera is good for personal images but not professional use.
Zoom compact example: Panasonic Lumix ZS50 or TZ200
Advanced compact cameras come bundled with the bells and whistles of a manual camera without the bulkiness and larger price tag of a DSLR camera. It boasts manual modes (meaning you can adjust the aperture and shutter speed) and manual focus capabilities. Advanced compact cameras are still lightweight and user-friendly, but also shoot higher resolution pictures, making it the ideal high-quality on-the-go camera.
Advanced compact example: Canon PowerShot G3, Sony RX100 IV 20.1 MP Premium Compact Digital Camera
Compact Camera Pros: User-friendly, small, light, affordable, no extra lenses.
Compact Camera Cons: Little customization, limited zoom range, lower resolution.
DSLR (digital single-lens reflex):
DSLR cameras are for individuals who want to be serious amateurs to professionals. DSLR cameras use a mirror (or prism) to reflect the light into the optical viewfinder so the photographer sees everything in real-time. Since these cameras house a larger sensor and mirror, they are bulkier and heavier. DSLR cameras not only offer the full spectrum of manual modes and settings, but they allow for interchangeable lenses and other accessories such as external flash, microphones, etc. Despite the loud sound when shooting, DSLRs have fast shutter speeds and function better in low light than compact cameras.
DSLR Camera Pros: Optical viewfinder (no lag time), fully customizable settings, high resolution, interchangeable lenses, fast autofocus, long battery life.
DSLR Camera Cons: Bulky, heavy, loud, more expensive.
DSLR examples: Canon EOS Rebel T6i, Canon EOS 5D Mark, Nikon D3400, Nikon D850
Mirrorless Camera:
The mirrorless camera is the newest popular type of camera on the market. Instead of using a mirror to reflect the light, the light goes straight to the sensor and then is transmitted to the LCD screen with an electronic viewfinder, reducing camera shake. In a nutshell, it has most features of a DSLR camera but is smaller, lighter, and slightly less expensive on average. Due to their small size, they are good for traveling and are quieter than DSLR cameras.
However, since the technology is newer, there are fewer interchangeable lenses and accessories. There is a big debate over whether mirrorless cameras or DSLR cameras are better in the photography world. My answer is that they both have their strengths and weaknesses; the right camera is dependent on your priorities. They are both incredible manual camera types that offer the photographer a full set of creative tools for image composition to take their photography to a professional level.
Mirrorless Camera Pros: Lightweight, compact, quieter, no camera shake, often a little less expensive.
Mirrorless Camera Cons: Shorter battery life, slower focus, fewer lenses, and accessories.
Mirrorless examples: Canon EOS M50 Mirrorless, Sony a7R III Mirrorless Camera
Action/Adventure Camera:
Of course, we can’t overlook action/adventure cameras! These compact and durable cameras have made huge steps forward in terms of the quality of their photos and videos. GoPro even offers a frame capture tool where you can pull still frames from your videos and render them into photos. Although these photos won’t be as high quality as those taken with a manual camera, these are still powerful cameras for capturing the action on any adventure and their abilities shouldn’t be underestimated.
Action/Adventure Camera Pros: Lightweight, compact, durable, wind/weather/waterproof, mountable.
Action/Adventure Camera Pros Cons: Small sensor, fixed focus, little customization.
Action/adventure examples: GoPro,Nikon Coolpix, etc.
These are the six general camera types to consider as you make the jump to manual photography. There are pros and cons to each. Ultimately the type of camera you buy depends on how you will want to use it, which features are most important, and how much you want to spend on a camera. Once you have your manual camera in hand, your photography journey has just begun! Understanding the fundamental settings of a manual camera listed below will have you well on your way to improving your photography.
Modes On A Manual Camera
Most manual cameras have at least 5 different modes: Auto, M (manual), A (aperture), S (shutter speed), and P (program). Usually, there is a wheel on the top of your camera to change the shooting mode. (*Read your camera manual to learn where this mode dial is located, as well as where you can adjust your aperture, shutter speed, and ISO on your camera).
Auto (camera icon):
Similar to your smartphone, auto mode adjusts the camera settings for you to produce the best shot based on the information the sensors are receiving. Although this mode is great when you are learning, the beauty of having a manual camera is to use the other modes to capture images with more freedom and control. I strongly recommend you don’t use auto mode; you will create higher quality pictures with the other modes discussed below since you can adjust your settings properly. At the very least, it provides good practice in learning how to adjust the settings yourself.
Shutter Speed (S):
Shutter Speed controls the length of time that light enters your camera. You can think of it as the time it takes the camera to “blink” its eye, usually in a fraction of a second. When in shutter speed priority, you can adjust the shutter speed and while the camera automatically adjusts the aperture to properly expose the photo. Shutter speed numbers are usually indicated by fractions such as 1/500 (one five-hundredths of a second) or for longer shutter speeds 2” (two seconds). The faster the shutter speed, the less light the camera receives since the camera eye “blinks” quickly.
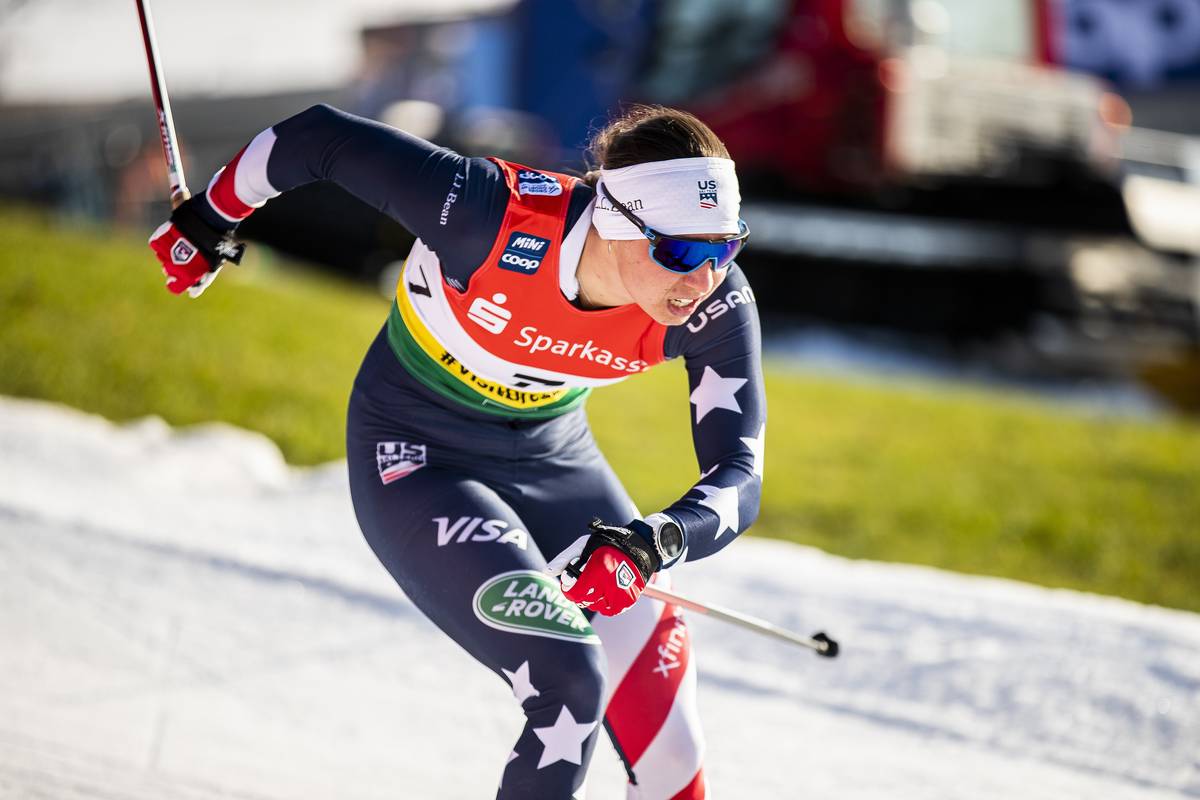
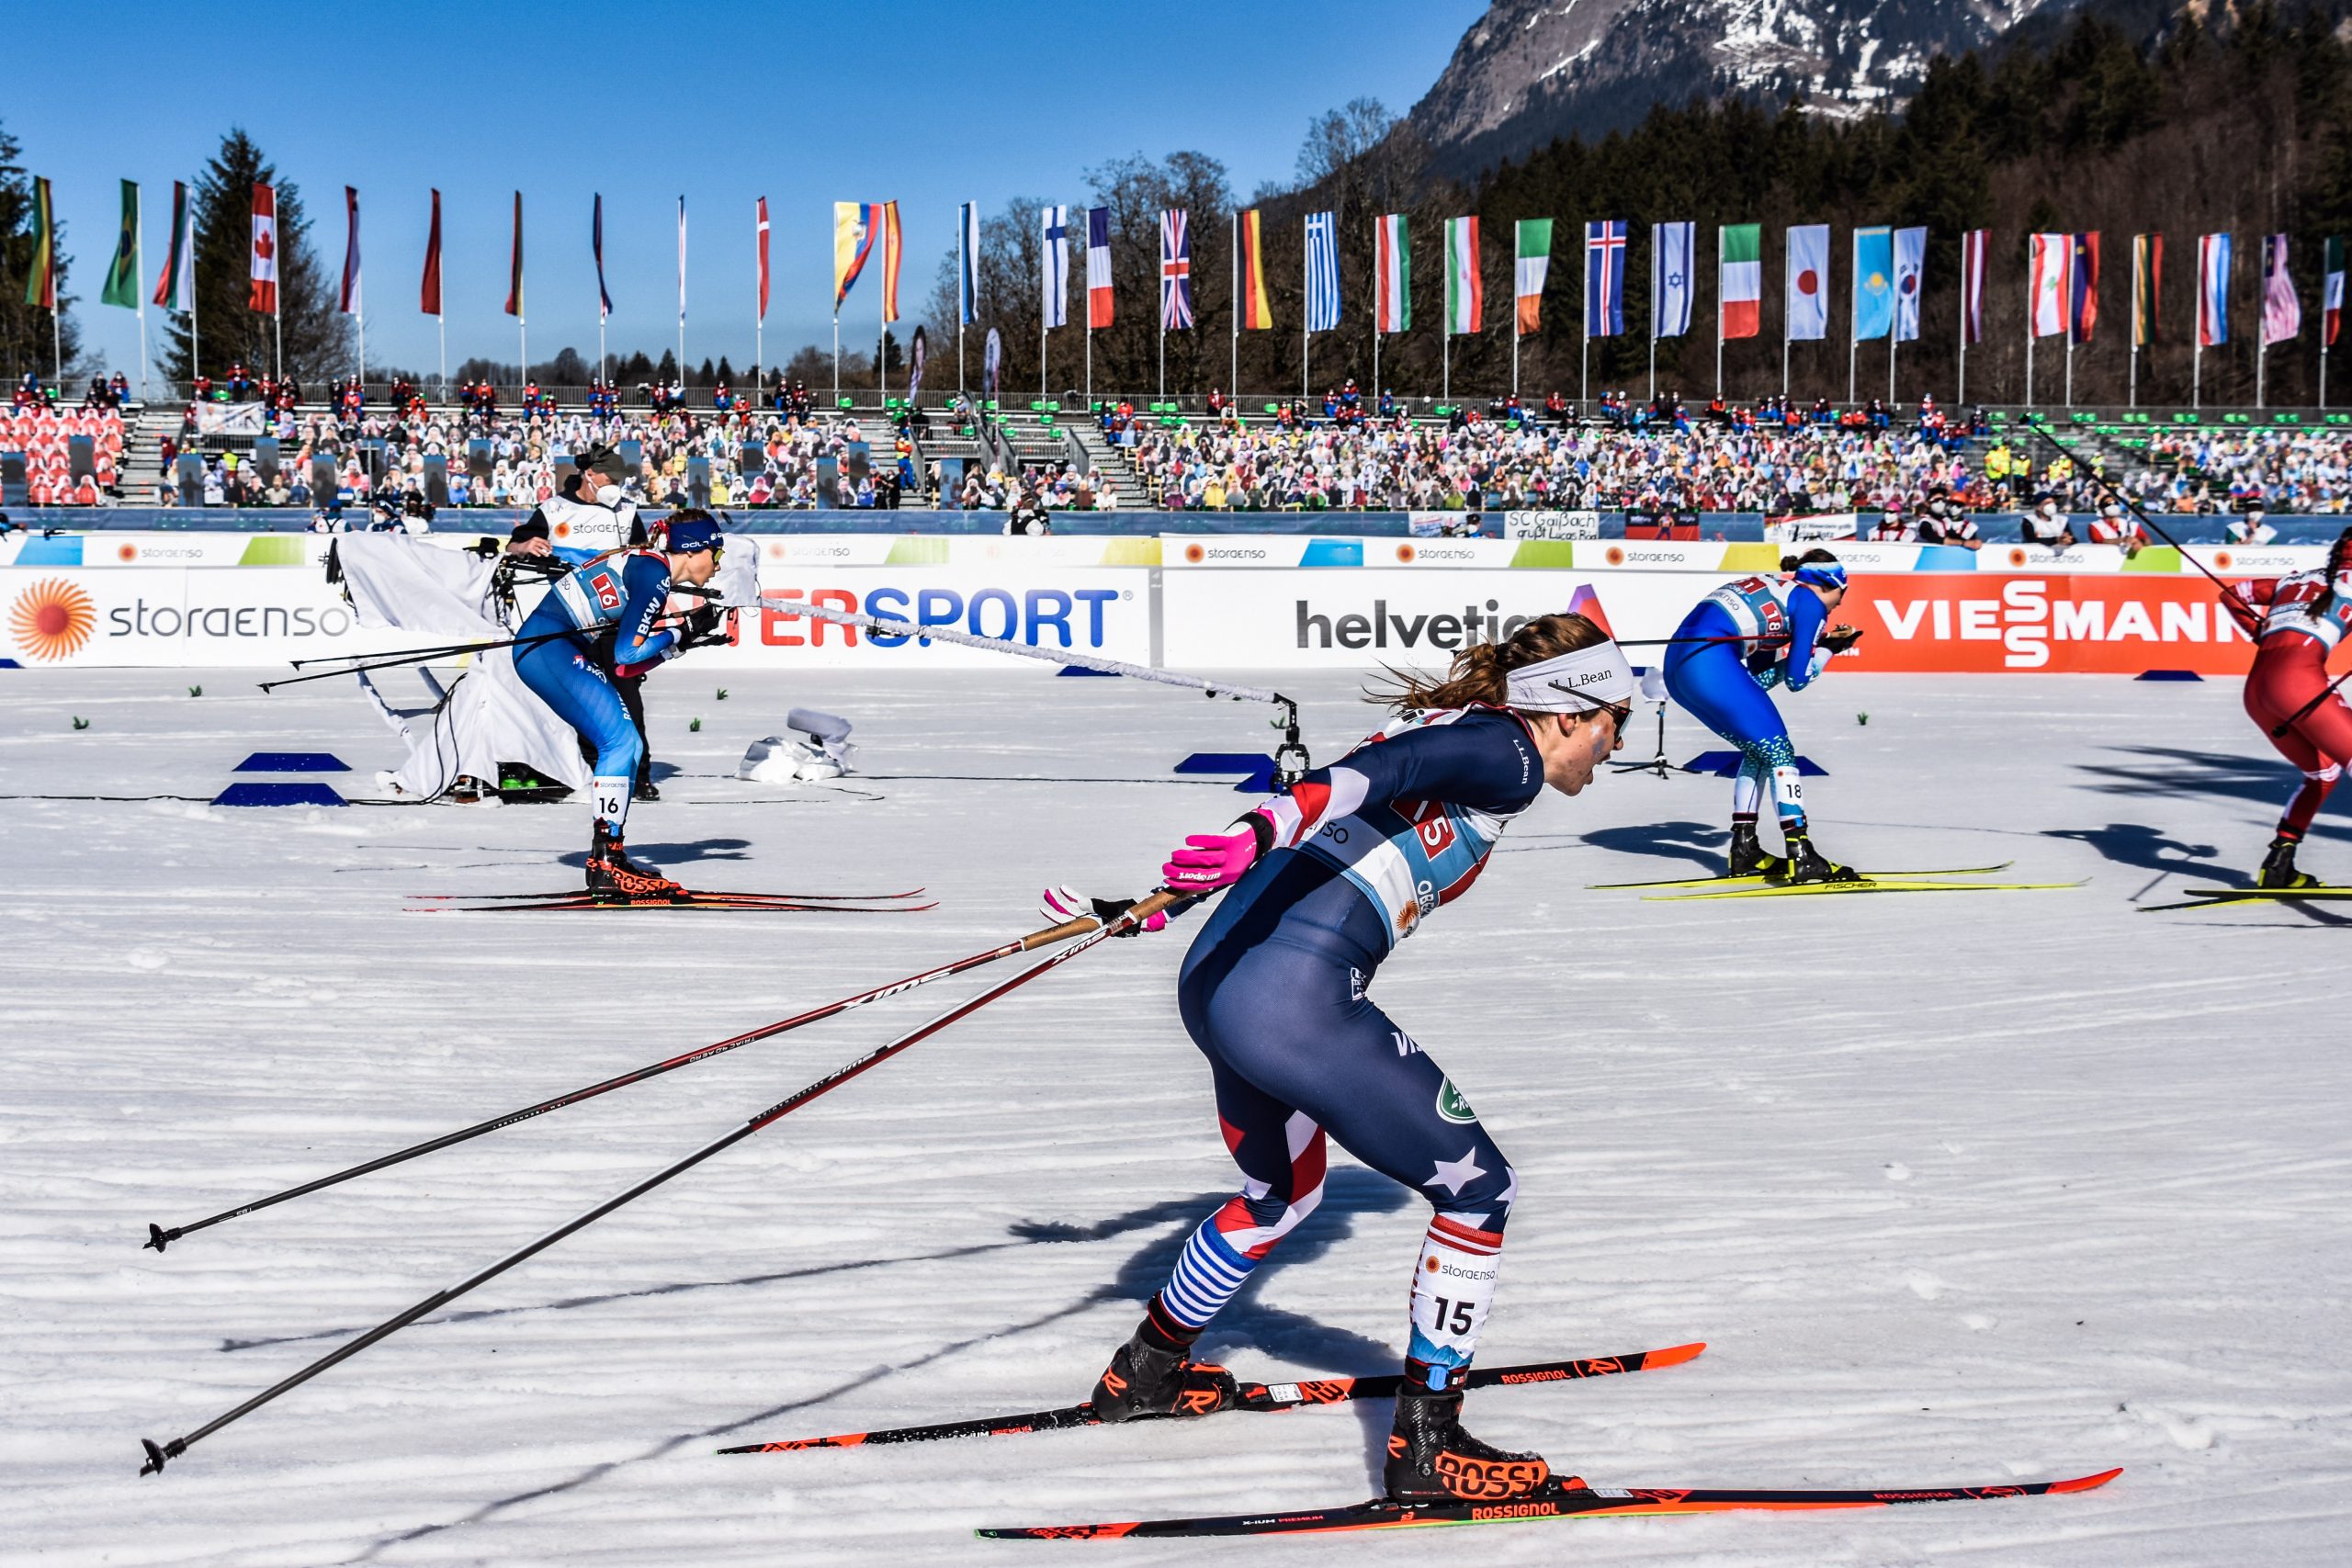
What can you do with shutter speed? You can freeze or blur a subject. To capture the fast action of ski racing, shutter speed priority will be your best friend. Generally, shutter speeds faster than 1/125 will start to freeze motion, but it is likely that you will need to shorten your shutter speed even more if a skier is zooming past in order to capture a crisp image. This is the mode I would recommend starting with when you first pick up a manual camera. It is my go-to mode when shooting action sports.
As you become comfortable with shooting in shutter speed priority, the next step in advancing your photography skills is to play around with slower shutter speeds to capture blurred motion. This can be a challenging but fun thing to experiment with. Motion begins to blur at 1/60, and the slower the shutter speed, the more blur you will see in your subject. One thing to note is that as you reach slower shutter speeds, it becomes difficult as a photographer to keep your camera steady enough to capture a clear image without a tripod. You may be seeking a blurred effect of your subject in motion, but if your camera shakes in slower exposures, the whole image becomes blurred – this is called “camera shake”. The best way to avoid camera shake is to mount your camera to a tripod or find a stable object to rest your camera on. In addition, some cameras feature an Image Stabilization (IS) or Vibration Reduction (VR) setting which might help reduce shake when shooting at slower speeds without a tripod.
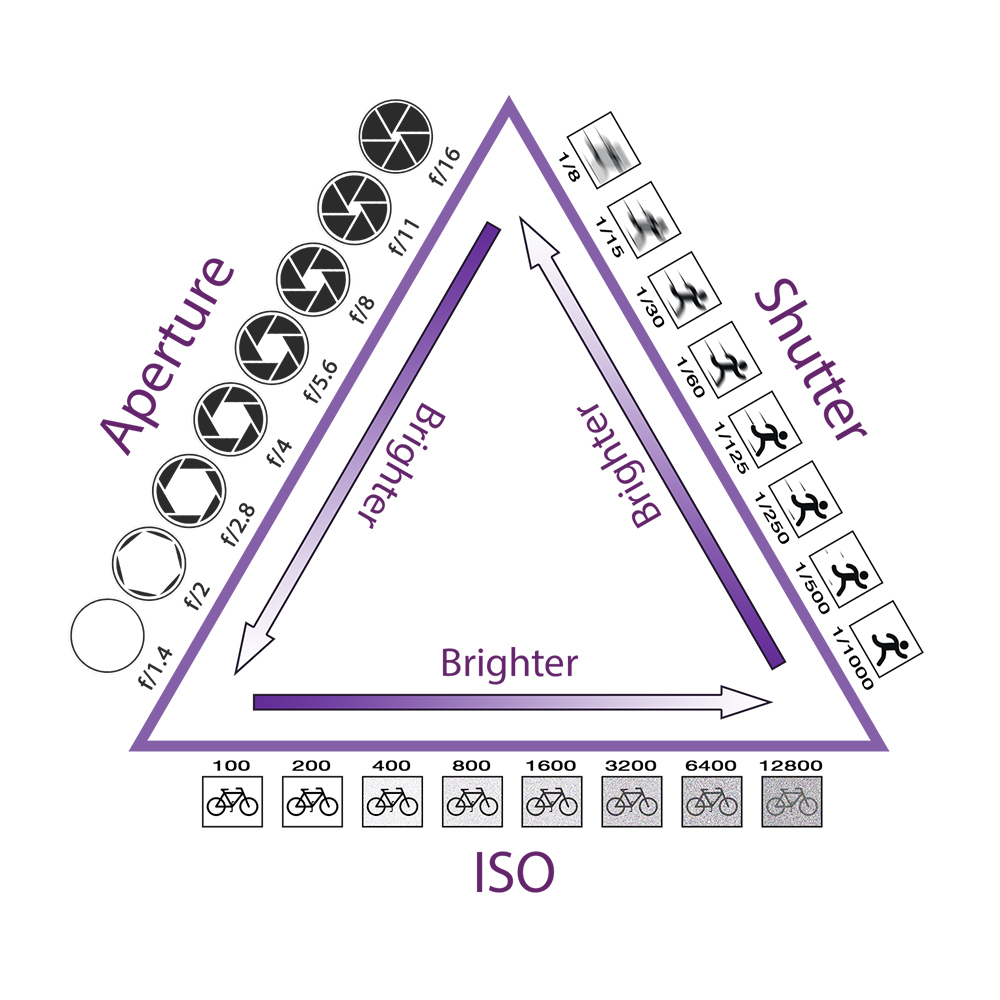
Aperture (A) controls how much light you let in the camera. You can think of it as the pupil of your eye. With plentiful light, your pupil gets smaller, and as the light dims, your pupil gets larger. In aperture priority, you can adjust the aperture and your camera will automatically adjust the shutter speed accordingly. Aperture values range from f/1.8 to f/22, with the f/1.8 allowing the most light in (pupil is the biggest), and f/22 allowing the least amount of light (the pupil is very small). Just to reinforce, the larger the aperture, f/22, the smaller the amount of light entering the camera.
Not only can you adjust the amount of light coming in using aperture priority, but it can change the look and feel of your image drastically. Aperture changes the depth of field of your image, or more simply put, how blurry the background of your image is.
A low aperture such as f/2.8 creates a very shallow depth of field, that is, very little depth of your image is in focus, and as a result, everything in the front and behind your focus point is blurred out.
An aperture of f/22 on the other hand, has a deep depth of field, which makes everything in your image clear. You have probably seen many photos that have used different apertures to achieve a distinct visual effect. However, you may have not noticed how that effect is created. Low apertures are great for portraits because your subject’s face is in focus and stands out from the blurred background. Higher apertures are best for landscape images because you want to capture a whole landscape with varying depths. It sounds confusing at first, but this diagram is really useful when you are first starting out with learning how aperture adjustments function.

Manual (M):
Manual mode lets you take full creative liberties with your camera. Unlike aperture or shutter speed priority, manual mode does not adjust any settings for you. You set your aperture and shutter speed. This mode is the best way to really get to know your camera and experiment with how each combination of aperture and shutter speed can drastically change the look of your image. The exposure meter built into your camera will be your best friend when shooting in manual. As you adjust your shutter speed and aperture, the exposure meter will indicate whether you are over or underexposing your image. This will guide you in which direction to change your settings to properly expose the image. I would recommend using manual when you are learning how to change aperture and shutter speed, or if you are trying to get a specific desired shot. However, in many cases, aperture or shutter speed priority will be the best mode to shoot in since they adjust the other value for you.
Program Automatic (P):
Program is the mode between auto and manual. Program mode will choose a combination of shutter speed and aperture, but you can still choose the best exposure values such as ISO, light metering, focusing, and flash settings. This is another great mode to learn as you experiment with introducing more control over settings.
ISO:
ISO controls how sensitive your camera is to light. ISO is often found in your settings or has its own button on the camera. When it is a sunny day out, your camera doesn’t need to be sensitive so you can lower the ISO. When it is cloudy or early or late in the day and there is less available light, your camera will need to be more sensitive to the light – that’s when to increase the ISO. A standard camera’s ISO values range from 100 to 1600. A good rule of thumb is that an ISO of 400 is good for an overcast day. If it is sunny, you can lower your ISO, and if it is darker than an overcast day, you should increase your ISO. Since ISO controls how sensitive your camera is to light, this should be set before you begin to adjust your aperture and shutter speed since it affects how much light your camera registers. A note of caution, as you increase your ISO above 800, your images will likely start to show some “noise”, the grainy texture on images when shooting in low light situations.
These settings may seem confusing at first, but once you get out there and practice, they will become much more intuitive and exciting to use. My recommendation for anyone wanting to capture ski racing is to shoot in shutter speed priority first. You can dial in the proper shutter speed to make sure the skier is in focus as they ski by.
Tip: If you don’t want to invest in a manual camera but still explore the power of having control over your camera settings, search and download a manual camera app in your app store. These apps allow you to adjust the same settings, just for your smartphone camera!


