This is Part 3 of a series delving into how biomechanics and movement patterns affect skiing technique. If you haven’t already, start with the introduction, Part 1 which introduces the concept of a neutral spine posture, and Part 2 which describes spine stability and mobility.
The ability to balance and be stable on one leg is where the rubber meets the road (or ski hits the snow). True, we generate propulsion with strength and endurance, but if that power is not transferred into glide, it becomes wasted effort. This is quite literally what separates the efficient from the inefficient. Or, the fast from the not so fast.
This study set out to quantify the difference in glide between elite and sub-elite skiers (national vs regional skiers). As expected, they found that the higher caliber skiers did, in fact, glide better. In trying to quantify the why, fitness aside, they found that the national level skiers had a different pattern of foot pressure in the boot. Where the regional skiers only pressured the medial side (big toe side), the national skiers loaded their feet across the whole foot.
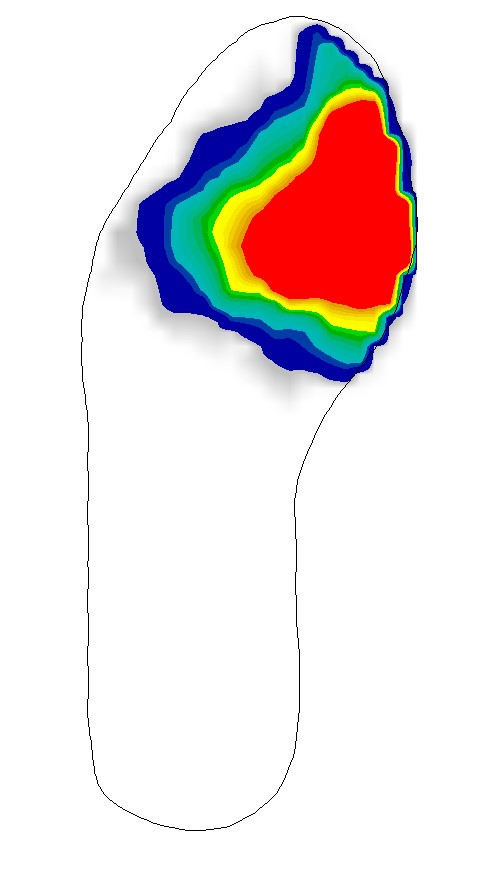
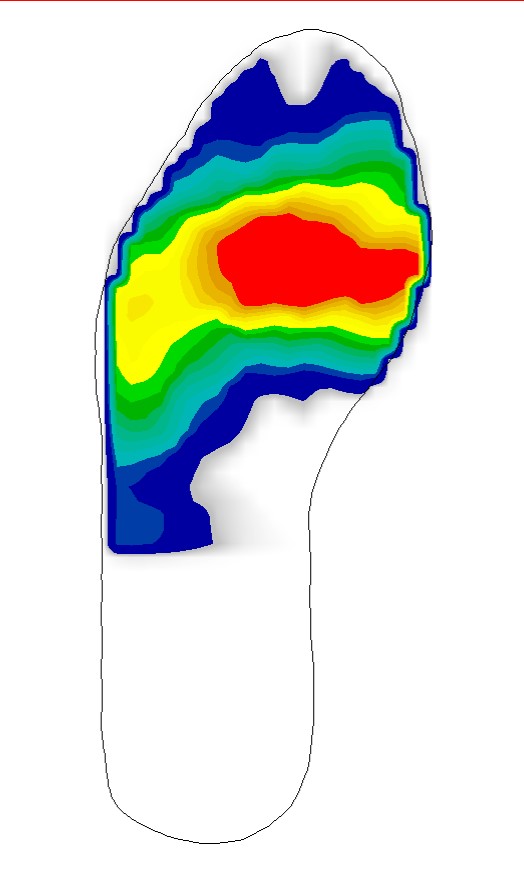
What’s really happening here is that the national level skiers were better at shifting their weight over the glide foot/ski. This “commitment” to the glide ski is one of the hardest things to master, especially for adults learning to Nordic skiing later in life.
When standing on two feet, your center of gravity falls in the middle between your feet. If you want to balance on one foot, your weight has to shift. You can’t just pick up one foot. To achieve this weight shift, you can lean your trunk, which will allow you to balance, but it is not a stable or powerful position. If you shift your pelvis to the side of the stance leg, you can accomplish the requisite weight shift AND place your body in a position where muscles are engaged and ready to roll .


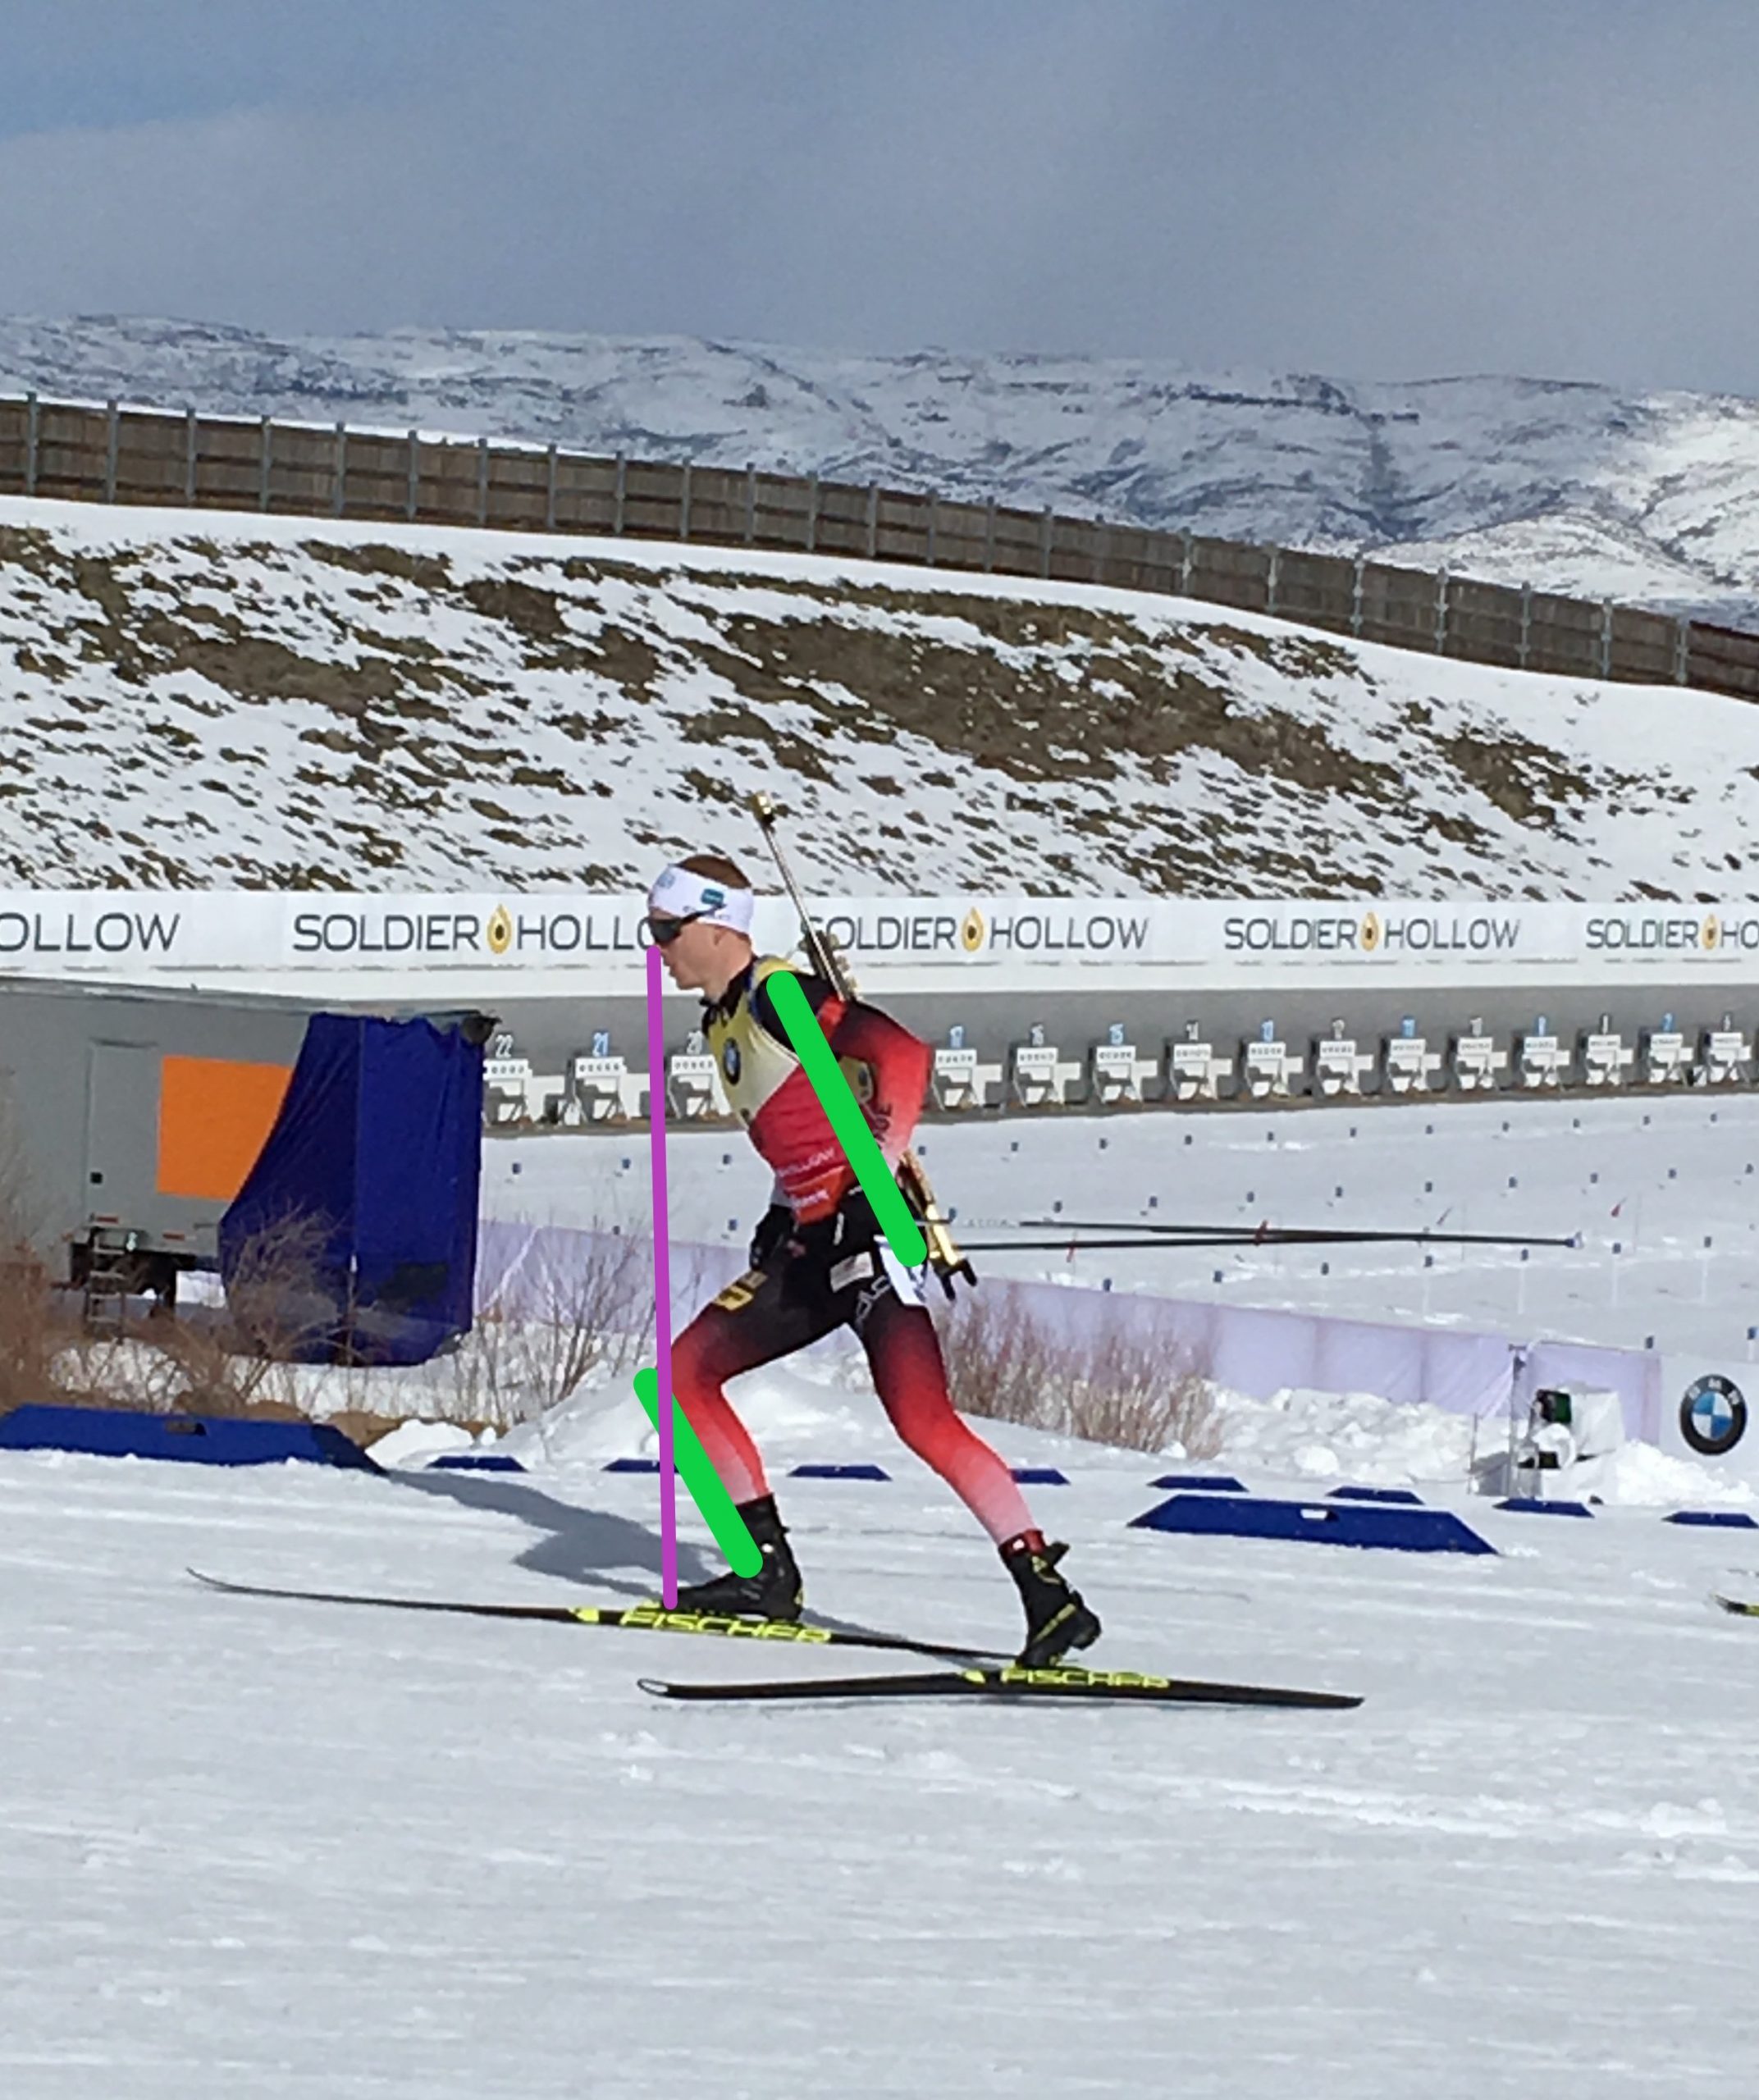
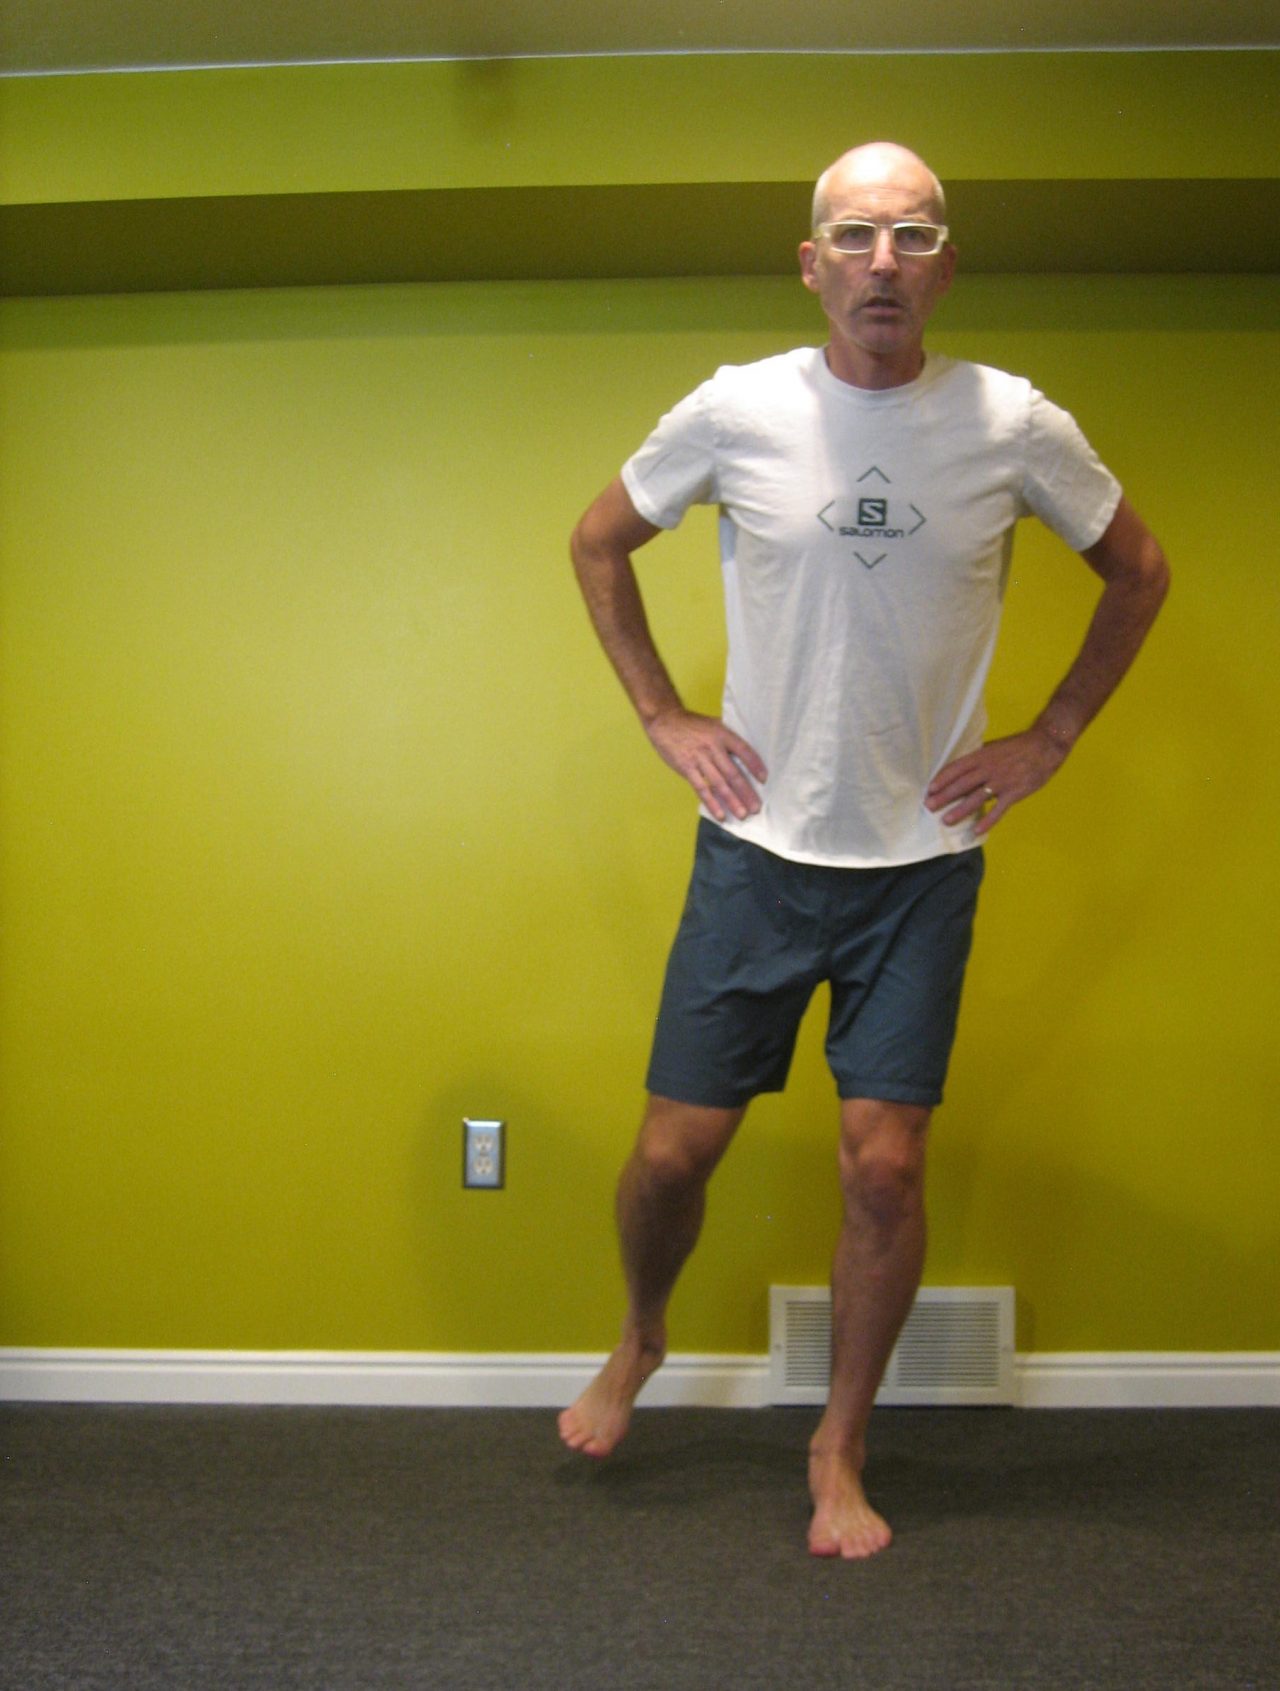
The skiers in this video are fine examples of appropriate, hip-centric weight shifts. Notice how the upper body stays very quiet and still. There is no side to side movement. The pelvis, however, can clearly be seen moving side to side to move the skier’s center of gravity fully over top of the glide ski.
This is all easier said than done. Go stand in front of a mirror — a bathroom vanity mirror is fine because you only need to see your shoulders. Balance on one foot. Do your shoulders stay level? Now move the opposite leg to the side and back a few times. Are your shoulders still level? If they are not, then it’s unlikely that you are shifting your weight appropriately. If you are struggling with balance on a smooth, flat floor, you can appreciate the challenge of finding stability while gliding down an undulating track on a toothpick of a ski.
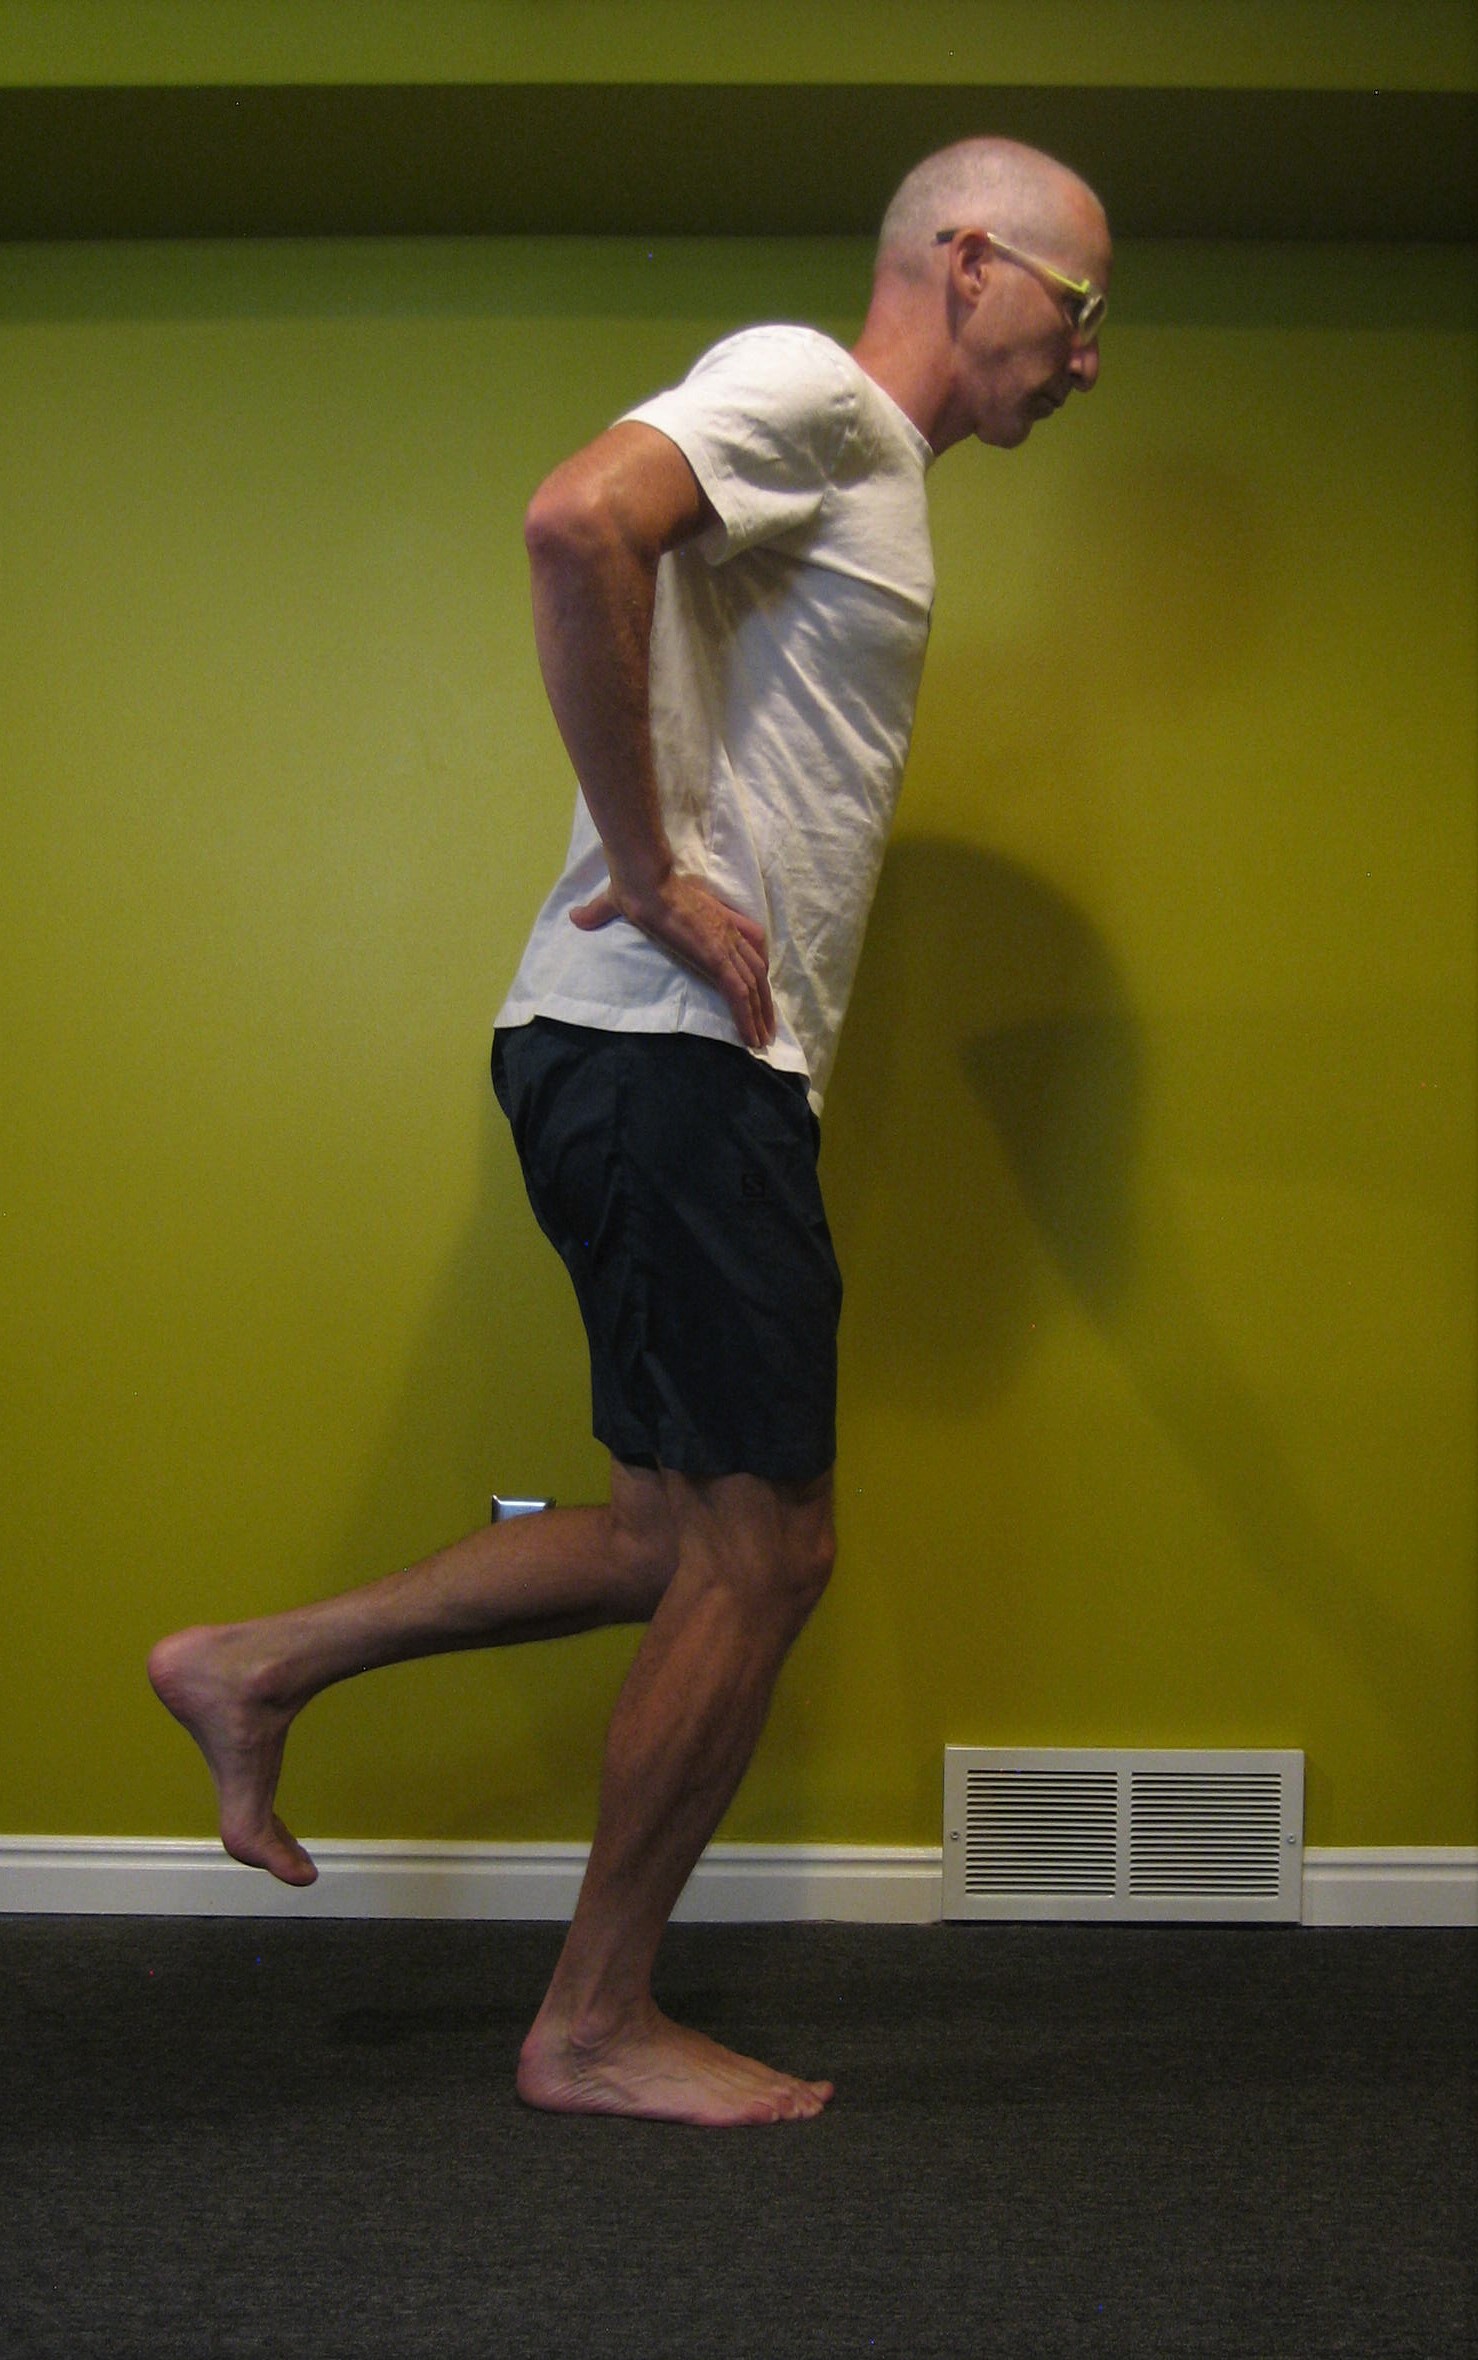
Another major component of single limb stability is the coordination of joint flexion at the hip, knee, and ankle. Anyone who’s had a ski lesson has heard the phrase nose, knees, and toes — or that the shin and trunk should be parallel. These cues are all about getting the ankle, knee, and hip to flex together. The goal is to put the body in a position that is both inherently stable due to muscle activation and preloaded for propulsion. This is what I’ll be referring to as the basic shape.
The next experiment requires a partner. Balance on one leg staying very upright with your knee and hip straight. Have your partner push you (gently!) from each side. Did you maintain your balance? Now aim for the nose, knees, toes position and have your partner push on you again. Which position was more stable? (If you had difficulty finding this position, there will be more cues with the exercises below.)
If the distribution of foot pressure and coordinated joint flexion are two major components of single leg stability — which has been shown to be a major component of skiing efficiency — then it seems highly rational that we should strive to perfect these traits on dry land before we expect ourselves to do it on skis (including and arguably even more so on rollerskis). We must be able to form the basic shape.
Adequate strength of the gluteal muscles is a prerequisite. If you don’t already incorporate glute exercises in your strength program, you can get some great ideas from previous FasterSkier articles here and here.
Foot and ankle mechanics are also a primary contributor. In the basic shape, we are asking the ankle to flex forward at the same time that the foot has to accept our full weight. Insufficient or excessive flexion, or poorly controlled mobility through the foot and/or ankle can force the tibia (shin bone) to rotate inward, taking the knee with it. Lack of glute strength and control can have the same effect from the top down. With this extraneous motion coming from either direction, the result is an increased valgus (medially-directed) force on the knee, which equates to increased loads in both the tibiofemoral and patellofemoral joints. Clinically, this is the most common cause of knee pain with Nordic skiing.
If the prescription for controlling top-down motion is glute strength and coordination, the bottom-up is addressed through strength of the muscles in the foot and ankle. Conveniently, these can often be addressed by simply working on single limb stability — as long as you pay attention. Quality control is mandatory!
A note on orthotics: In many circles, custom orthotics have fallen out of vogue especially since studies like this one have found them to be no better than exercise at helping knee pain. But the demands on the ankle joint are quite different in Nordic skiing than with walking or running, which are more commonly studied. Skiing generally requires a much greater amount of dorsiflexion. As mentioned above, we want this dorsiflexion to happen without internally rotating the tibia. The addition of external support to the foot has the potential to control this aberrant motion. I am a strong proponent of at least some upgrade of insoles in ski boots (and cycling shoes for the same reason). Most stock insoles are terrible, even the ones that came in my very expensive carbon boots. Out-of-the-box options from Superfeet, Sole, Powerstep, and Curex are all quite good and far less expensive than custom. For some, these might not provide enough support and custom orthotics with a strategic build up of additional material would be better.
How do you know? A quick test I do in the clinic is to have my patient balance and do a couple of single leg squats while barefoot. Then I have them do the same thing with a more supportive insole. Then I place a piece of ¼” (4mm) thick folded cardboard under the insole at the ball of the foot and have them repeat the balance and squats. I’m looking for whether they become “easier,” “less painful,” or appear better controlled to my eye. If the extra material under the insole made for improvements, then we talk about custom orthotics. If it made no difference, then I just advise an upgraded insole. Ultimately, we are looking to improve both the alignment of the knee as the ankle dorsiflexes AND improve balance.
All of that said, here are my top three exercises/drills for ski-specific balance–the basic shape. Ideally, these are done barefoot, without the additional support of an insole and shoe (opposite of the previous conversion), so the muscles have to work harder and get stronger. The basic cues are the same for all three:
- Tripod Foot: A tripod gets its stability from three legs and we want three primary pressure points on the foot–the ball of the foot, the pinky side ball of the foot, and the heel. Weight should be slightly biased forward off of the heel. The toes should be on the floor but relaxed and not gripping for dear life.
- Nose, Knees, Toes: My preferred way of thinking about this is if snot is dripping from your nose, you want it to land on your shoe not down the front of your shirt. Bend at the ankle, knee, and hip to accomplish this.
- Weight Shift: comes from the pelvis/hip not leaning the trunk. Park yourself into the hip. If your glutes aren’t burning, you’re doing it wrong (or the exercise is too easy).
- Posture: neutral spine is the goal. Forward trunk lean occurs through the hips, not the spine.
- Forward Gaze: Avoid staring at your feet. You’ll need to keep your head up to look down the track while skiing, so best to get used to it in training. It will also remove some visual dependency and help with maintaining a neutral spine.
- Quality vs Quantity: the emphasis is on how you do the exercise, not just going through the motions.
Start by forming the basic shape. If this is challenging to maintain, then do not progress until it becomes natural and thoughtless.
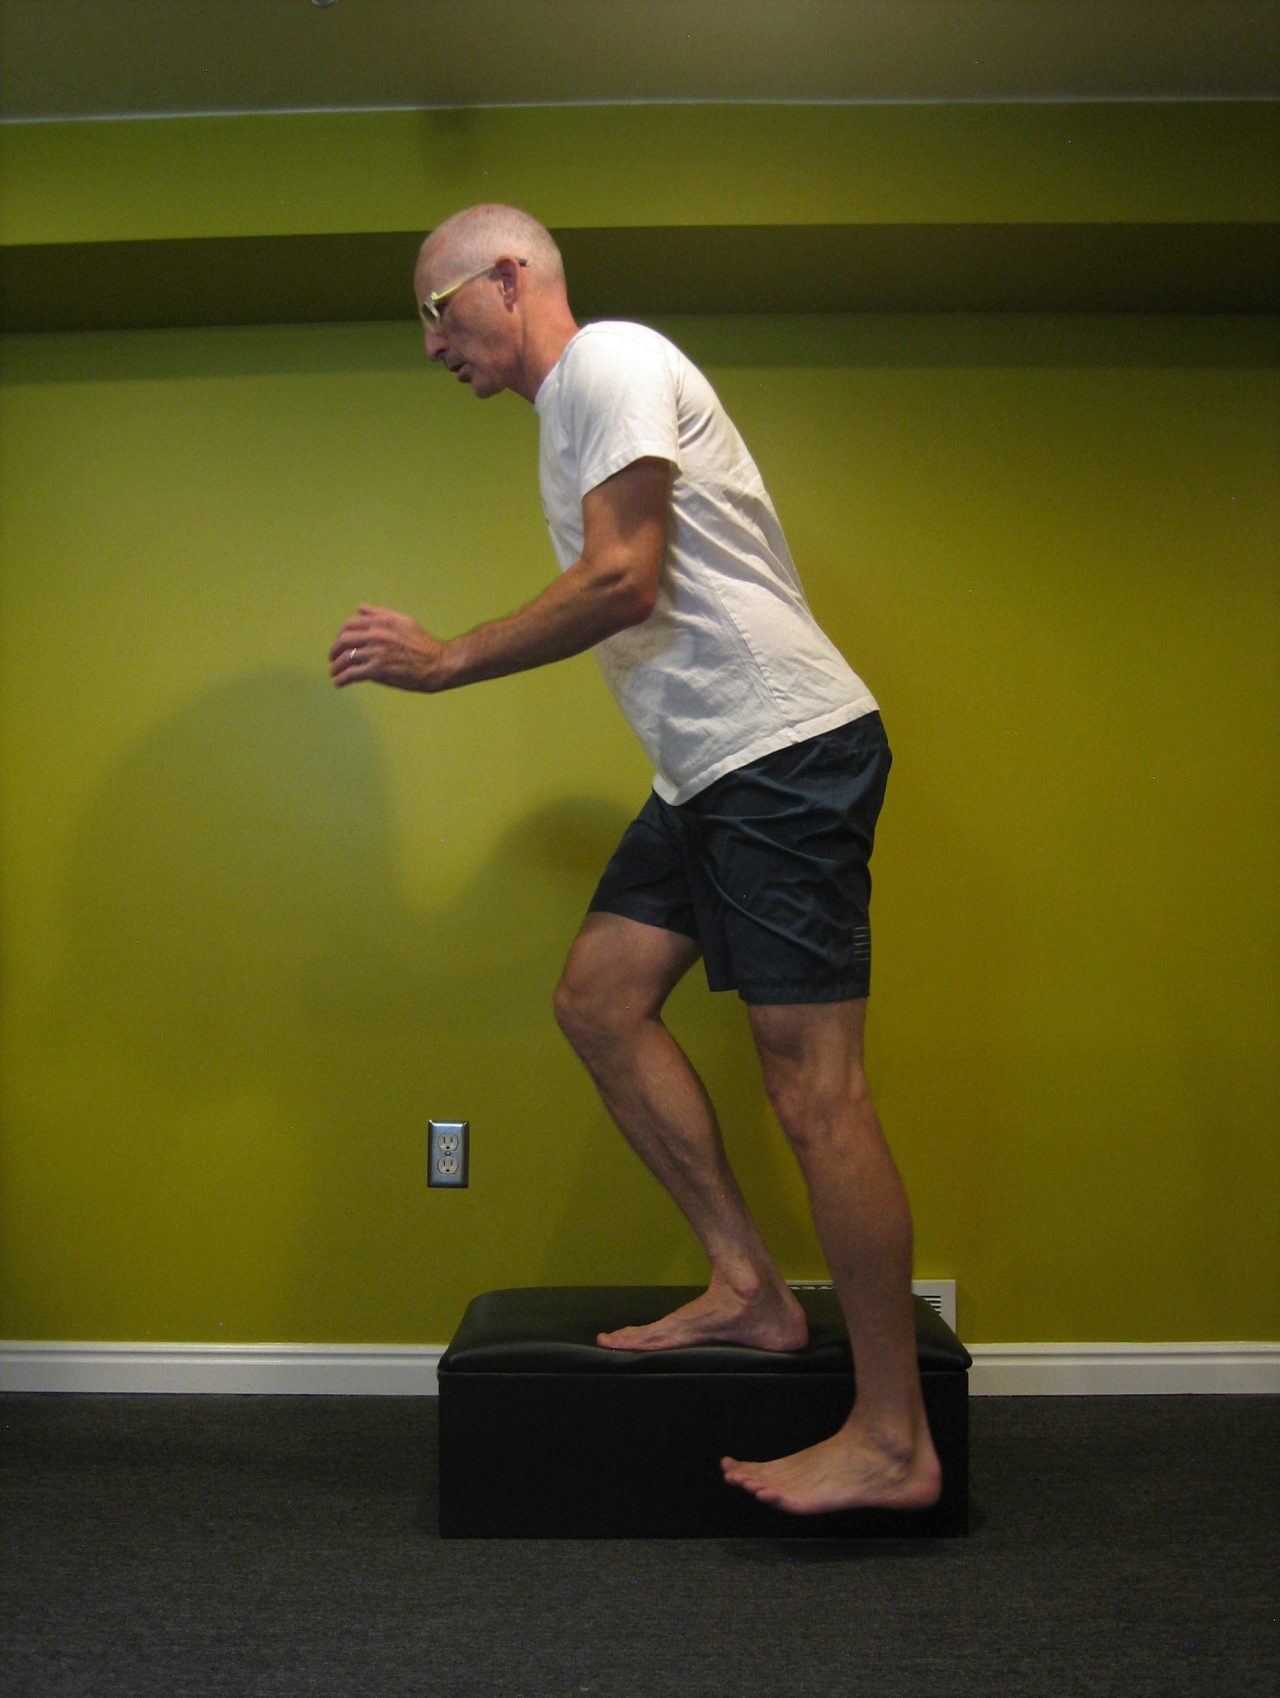
Exercise #1: Step Ups
Stand sideways on a step (preferably the bottom, not top, step). Lower your outside foot towards the floor. As you lower, you should be going into the basic shape. Return to the tall starting position. Don’t worry about trying to fully touch the floor–that’s not the goal. The goal is to move up and down, in and out of the basic shape. For added challenge, hold a dumbbell in the outside hand. 2-3 sets of 10-15 reps should be adequate to bring on some fatigue and challenge your balance.
Exercise #2: Single Leg Series with Band
Loop a long exercise band around one ankle and face the anchor point of the band. Than, assume the basic shape standing on the unbanded leg. While maintaining the basic shape, pull straight back against the band to bring the foot in line with the standing leg, then follow through to kick the foot a few inches behind. Turn your body 90 degrees in either direction and repeat the process; extending the banded leg outward to work the gluteus medius muscles of the outer hip, or pulling the banded leg toward the standing leg to stimulate the inner adductor muscles. Ultimately, you will face four different directions but the force against the band is always in direct opposition to the anchor point of the band.
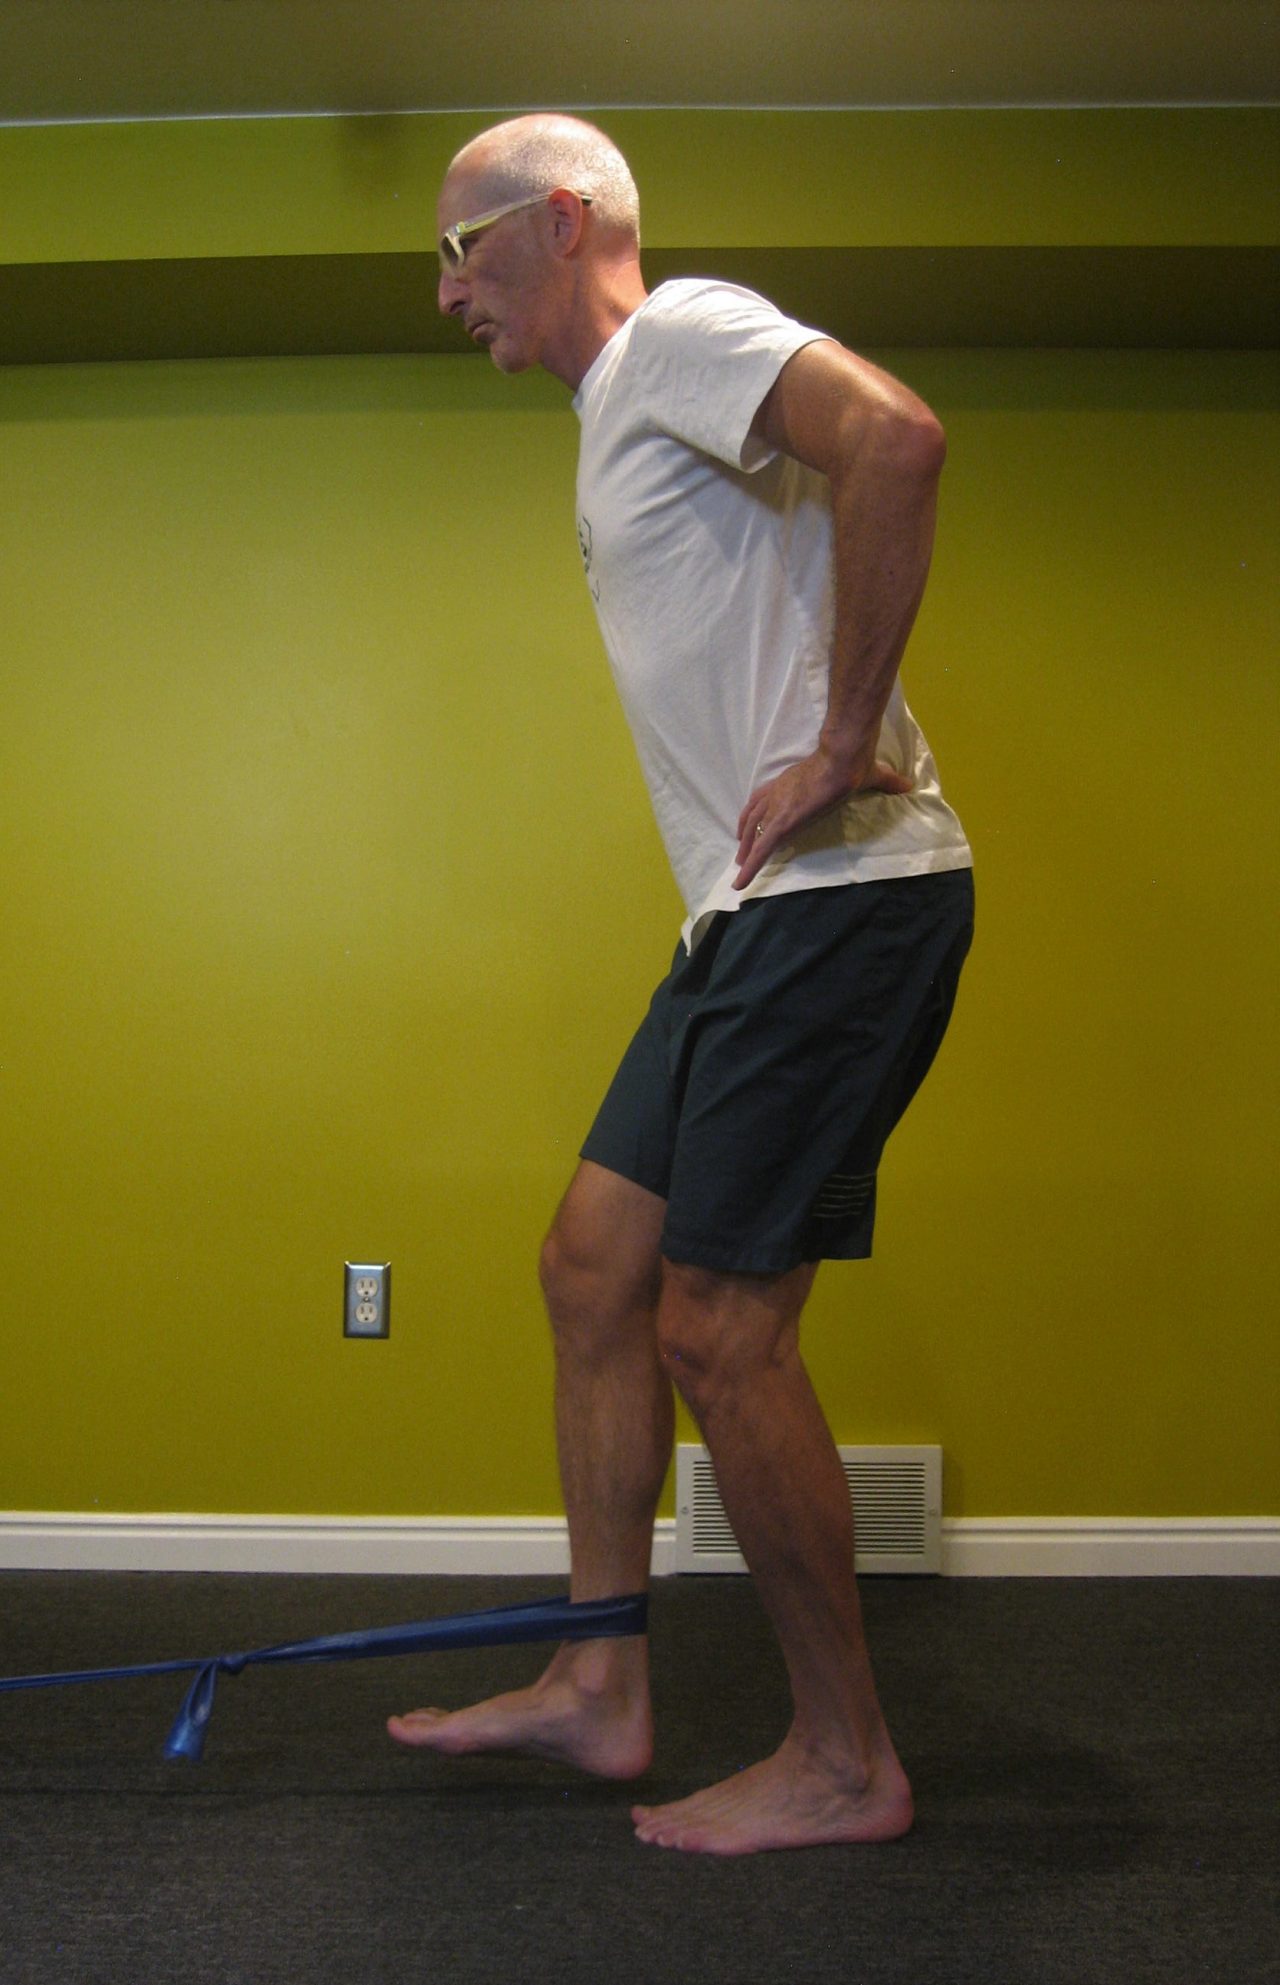


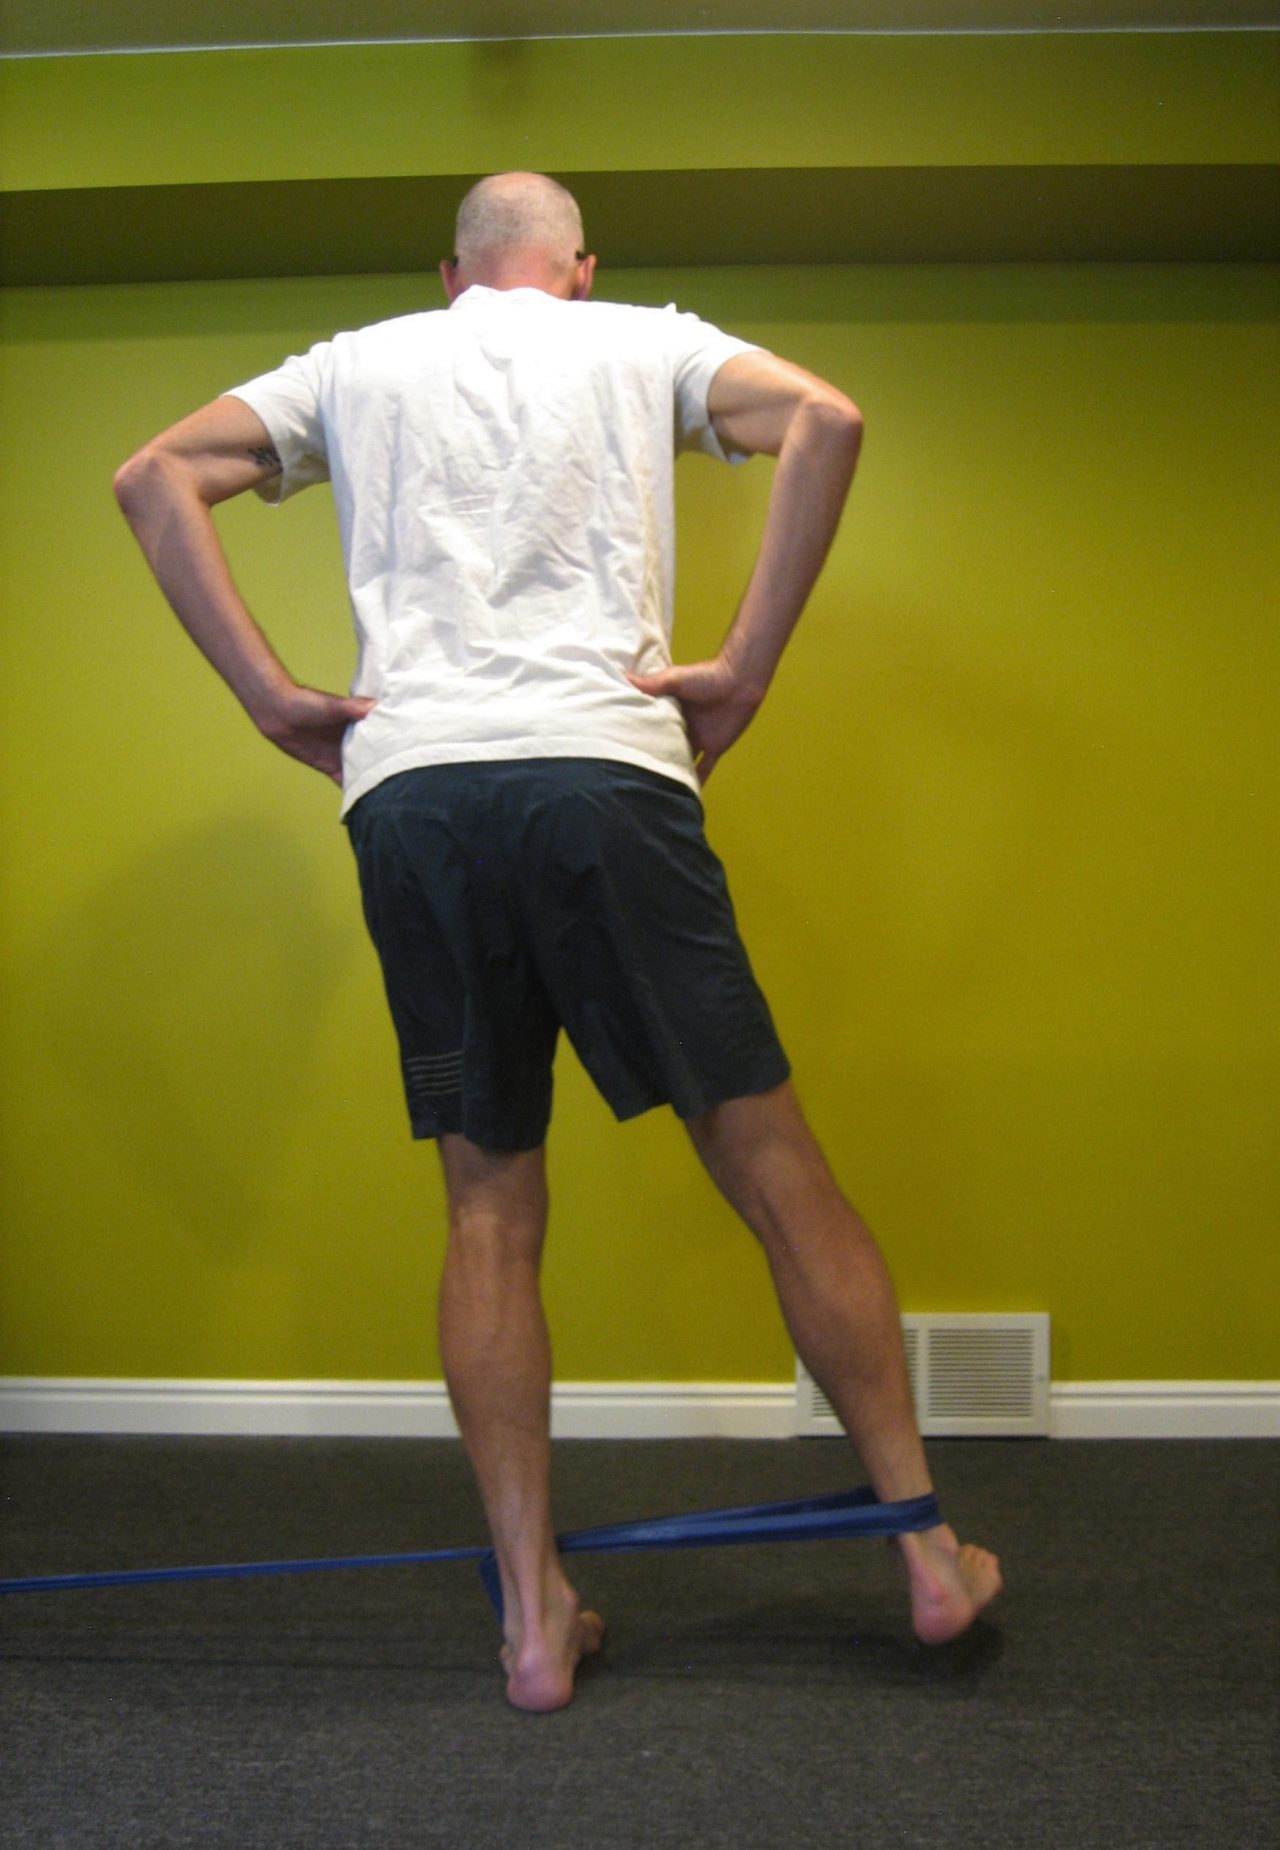
If you can only source a “mini-band” loop, put it around both ankles and skip the pulling-in motion. A little resistance goes a long way with this exercise. Aim to perform 10-15 repetitions in each direction and do two laps on each leg.
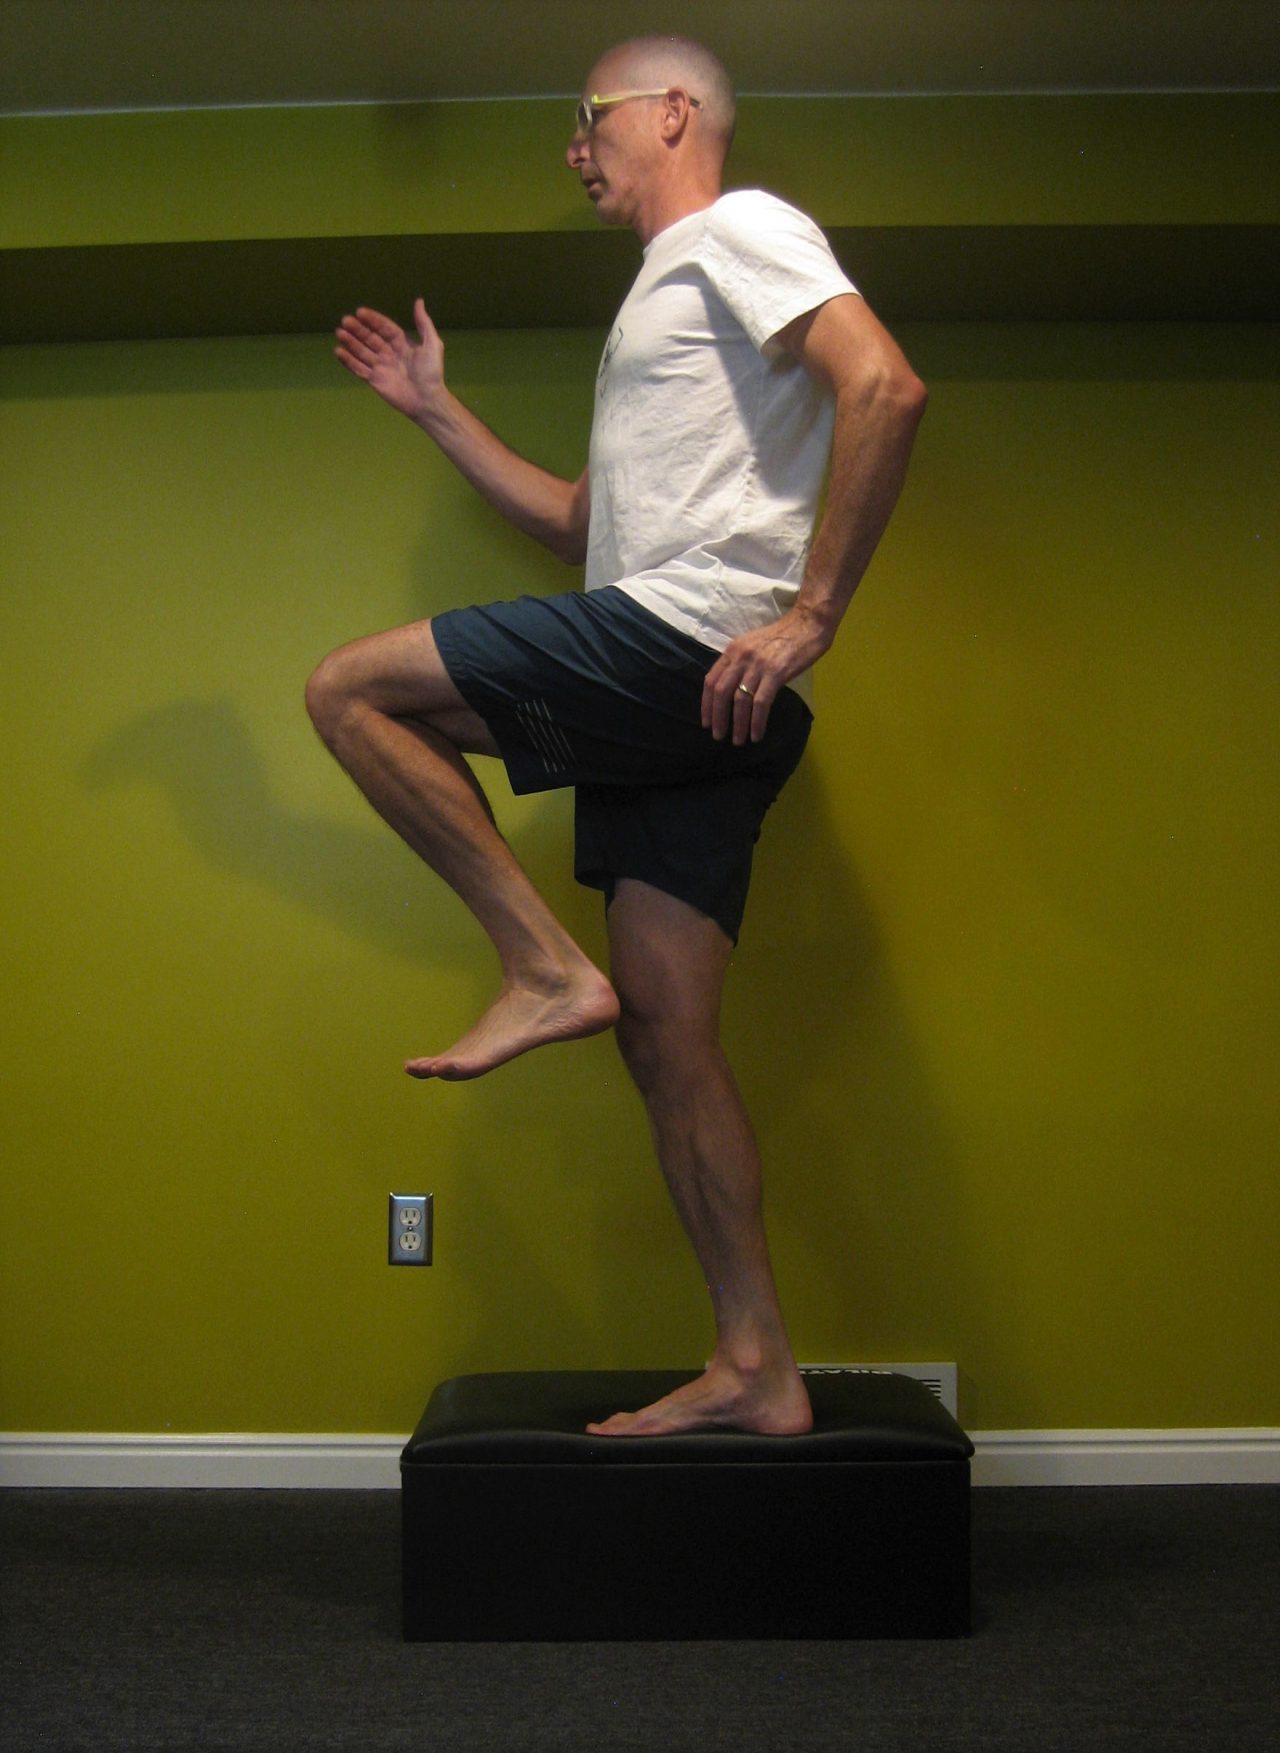
Exercise #3: Lateral Hops
Form the basic shape on your right leg. Step onto the left leg, shifting your weight from the pelvis, and again form the basic shape. Progressively increase the distance between steps, turning it into more of a sideways hop than step. Keep the unloaded leg extended to the side as if skiing — do not let it flag behind the stance leg unless you are a speedskater.
Keep it honest: make sure you are sticking the landing and holding your balance for a second or two on each leg before pushing off to the next side. This is meant to be a balance exercise, not plyometric strength work. The next progression is to hold a resistance band anchored from the side. I prefer to base this exercise on time (1-2 minutes) vs repetitions so there’s no question of whether that botched one was good enough to count.

Notably absent from this article is the neurological component of balance. Many of my PT colleagues would absolutely berate me over this; however, I wanted to stick to the basic kinesiology and this article is long enough already. The brain receives massive amounts of information from vestibular, neural receptors in joints and soft tissue, and vision. In fractions of a second, it processes this information and directs muscles to act. If any link in that system is compromised, so too is your balance. If you think about the difference between skiing on a sunny, bluebird versus flat light or a storm, you can quickly appreciate how vision affects balance. There are certainly ways to challenge and train these systems, but that is beyond the scope of this article. However, an excellent way to progress any balance exercise is to do it with your eyes closed.
Ned Dowling
Ned lives in Salt Lake City, UT where his motto has become, “Came for the powder skiing, stayed for the Nordic.” He is a Physical Therapist at the University of Utah and a member of the US Ski Team medical pool. He can be contacted at ned.dowling@hsc.utah.edu.


